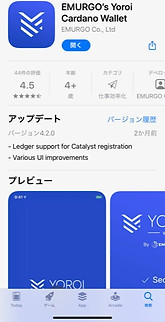

Creating a Yoroi wallet (smartphone version)
We will explain the initial settings and staking method of Yoroi Wallet (smartphone version).
1.Download the Yoroi Wallet app

☆ “yoroi” on the smartphone app store
Search or
Yoroi Wallet HP https://yoroi-wallet.com/#/
Search fromplease.
☆Language (Japanese) ☆Terms and Conditions (Agreement)
2.Add wallet

☆Select Add wallet (SHELLY-ERA)
*SHELLY-ERA is the wallet version name.
Please select here.
3.Create a wallet

☆Create wallet
4.Enter wallet name and password

☆Enter the wallet name of your choice
☆Set the remittance password with 10 characters or more
*Required for ADA remittance and staking
Please do not forget.
*If you have forgotten, please restore your wallet.
Can be reset.
5. Recording your recovery phrase
*This is the most important process*

☆Record of recovery phrase
・Write on multiple pieces of paper and store in separate locations
・Save in USB memory
We recommend storing them in separate locations such as .
☆Required when deleting the app or changing the model.
Open your wallet if you lose or forget it
If you are unable to do so, you will lose your assets.
☆If someone finds out your recovery phrase, your assets can be stolen.
Please do not tell anyone because there is a possibility that they will
Please give .
☆If you can record it,
Tap "I wrote down my recovery phrase"
6. Check recovery phrase record

☆Tap "OK"
7.Confirm recovery phrase

☆Tap the recovery phrases in the correct order,
Please line them up.
☆Tap "Approve"
8.Wallet completed! !

☆Wallet is completed!
Congratulations㊗
9.ADA deposit to wallet (remittance procedure from BITPOINT)

☆Tap "Receive" at the bottom right of the armor wallet
and the receiving QR code.Address will be displayed
So, copy the addressTap
10.BITPOINT (Smartphone version) Remittance procedure

~BITPOINT~
☆Tap "Deposit/Withdrawal" below
☆Tap “Withdraw” in the ADA column
11.Register remittance address to BITPOINT①

☆Tap "Add"
12.Register remittance address to BITPOINT②

☆Enter your favorite name for the label according to the purpose
☆ Enter the Yoroi wallet address in the address field
copy
☆Tap "Add"
13.Register remittance address to BITPOINT③

☆Confirm the registered email addressEmail for has been sent
, so please enter the email authentication link on the same device.
click
☆After email verification, return to BITPOINT and tap "Next"
14.Register remittance address to BITPOINT④

☆Perform two-step authentication in the same way as when logging in,
Completion of registration!
15. Transfer money from BITPOINT to Yoroi Wallet ①

☆ “Withdrawal destination”Select registered address
☆Enter remittance amount (tap all for full amount)
*First, store a small amount in your wallet properly.
Please check to see if the money has been sent
I recommend it.
16. Transfer money from BITPOINT to Yoroi Wallet ②

☆Perform two-step authentication in the same way as when logging in,
Completion of registration!
17.Remittance confirmation

☆ Remittance confirmation screen (BITPOINT)
A processing completion report will also be sent to your registered email.
☆Tap on the bottom left of the Yoroi Wallet (Transactions)
You can see the progress of the deposit, so please wait until the deposit is made.
Please wait.
18.Staking settings

☆Tap the bottom left of the screen (Delegate)
☆If you can delegate the search to OKAYAMA POOL,
“OKYM"input
☆If the above "OKAYAMA POOL" appears
Please tap "DELEGATE"
☆Delegation is complete! The first reward will arrive in 15-20 days.
After that, it will be automatically entered every 5 days!